If you want to set up an IMAP or POP3 email profile on an Apple device (e.g. iPhone, iPad or Mac), you can do this with the Apple Configurator by creating a configuration profile.
Aim
In this How-To you will learn how to create the IMAP or POP3 email profile with the Apple Configurator. You can then upload this profile to the Cortado administration portal and distribute it to your users.
Implementation
- Download the Apple Configurator to your Apple Mac. The Configurator can be downloaded free of charge from the Mac App Store.
Start the Apple Configurator and click on File and select New profile (upper arrow in illus.).
Switch to General and fill in the mandatory fields.
Under Security, select the option Always. Under Automatically Remove Profile, select Never (lower arrows in illus.).

- Select Mail in the left-hand column and then Configure.
- Now configure your e-mail account. Under Account Type, select either IMAP or POP3 (example in the image).
- Enter the User Display Name and Email Address and configure the profile as desired.

- Enter your connection data for the incoming and outgoing mail server. You can obtain this information from your e-mail provider.
- In the example, the data for IONOS Mail was used:

- User name: Either enter the user name here or use a variable: #UserEMailAddress#.
- Password: You can enter the user's password here. The user can also enter the password themselves later on the iOS/iPadOS device under Settings→ Mail→ Accounts. Please note the following:
Note! The password must first be entered under Server for outgoing mails and then under Server for incoming mails.
- Save the profile after configuration.
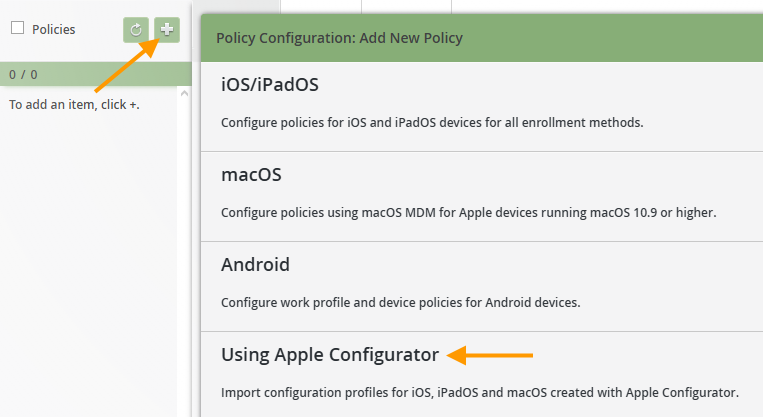
- Now open the Cortado administration portal and select Administration→ Policies.
- Add a new policy by clicking on the plus button (upper arrow in illus.).
- Then select Using Apple Configurator (lower arrow in illus.).
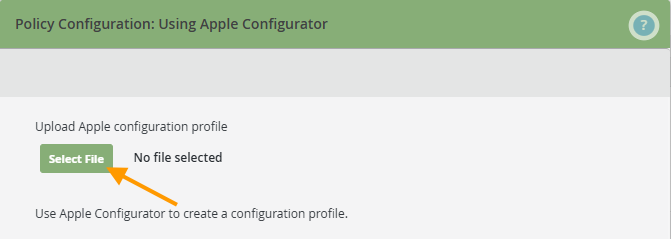
- Upload your saved configuration profile (*.mobileconfig) (arrow in illus.).
You can now assign the new policy to the users/groups/devices.
- Select the appropriate policy (left arrow in illus.) and click on Assign (right arrow in illus.).
- Now select the users, groups or devices to whom you would like to assign the policy.
