This feature is already available in our new administration portal. The new portal is currently in beta. Instructions for using the new portal can be found at the end of this article.
Set up Managed Google Play accounts for your Android devices in the Cortado Administration Portal. This allows you to take advantage of all the benefits of Android Enterprise.
Configuring Managed Google Play accounts is simple and quick. This allows you to manage your users' devices and their apps in no time at all.
Note! Create up to four additional administrator accounts to configure Cortado MDM.
Register your organization with Google
Configure Google settings to the Administration Portal
Register your organization with Google
- If you want to use the Managed Google Play Accounts for your Android MDM, select in the Administration Portal Administration→ Settings→ Android Enterprise→ Enroll Android Enterprise.

- Then click on Start sign up.

Log in to Google in the next window. Use either:
- an existing admin account for Google Workspace,
- a business e-mail address that does not yet have a Google Workspace account,
- or any Gmail address.

1. Log in with an existing admin account for Google Workspace
- Enter your password and then click on Allow.

Registration is now complete. Your Workspace account has been successfully linked to Cortado. Continue as described below.
2. Sign in with a business email address that does not yet have a Google Workspace account
If you do not yet have a Google Workspace account, you can register your company directly now.
- Use an e-mail address with your company domain (e.g.: vorname.nachname@ihrunternehmen.de) to register.
- You will then receive a verification email from Google. Confirm your e-mail address by clicking on the link in the e-mail.

- Enter your contact details and confirm your entry.

- Add further subscriptions to your management account. Android Enterprise for Cortado is already activated.

- Set your password for the Google Admin Console and confirm the entry.

- Confirm the administration of Android Enterprise with Cortado and create your Google Admin account.

Registration is now complete. Continue as described below.
3. Log in with any Gmail account
- Select the option on the right and click on Sign up.

- You will now be redirected to the Google Play registration page.
- In the next window, click on Get started.

- You will need a Google account for the registration simply create a new account if you don’t have one already.
- Now use your Google account to sign in.

- Now enter your company name and then click on Next.

- Now provide the names and contact details of the data protection officer and the EU representative in your company.

- Then click on Complete Registration.

The registration is now complete.
Configure Google settings to the Administration Portal
Further settings can be made in the Cortado administration portal if required.
- To do so open the Cortado Administration Portal under Administration→ Settings→ Android Enterprise→ Configure.
Device synchronization
- We recommend the use of immediate push notifications based on Google Firebase Cloud-Messaging (upper arrow in illus.). This setting is activated by default. This ensures that all assignments (apps, profiles, policies, etc.) to your users' devices are executed immediately.

Note! The Google Play Services must be activated in the Google Workspace Admin Portal for this (arrow in illus.).

- Otherwise, pull synchronization is used automatically. Here you can define an interval between 30 and 43200 minutes in which the user's devices are regularly synchronized (lower arrow in illus.). Apps, policies, profiles and so on are then pushed to the devices at the specified interval.
Configuration of Android Enterprise
Here you can find your Android Enterprise Organization ID.
The checkbox Auto enable users for Android Enterprise while import (upper arrow in illus.) is only needed when using Google Accounts. Do not make any changes here.
The Set up Managed Google Play accounts on fully managed devices (lower arrow in illus.) checkbox is also enabled by default (lower arrow in illus.). If you want users of fully managed devices (COBO) to manage their apps themselves, uncheck the checkbox. You can find more information on this here.
To configure a Fairphone, the checkmark must also be removed. You can find more information on this in our help article How to manage a Fairphone with Cortado MDM.

Enrollment Wi-Fi
Here you can store the access data for the WLAN in which the devices are to be registered for fully managed devices (COBO) and company-owned devices that are used for business and private purposes (COPE). This means that users no longer have to enter this access data on the Android device during enrollment. This simplifies the enrollment process.
If the device is not in the WLAN stored here during enrollment, registration will fail. It is not possible to enter the access data manually. Therefore, only enter access data here if you are sure that the device enrollment will be carried out in the WLAN stored here.
If you would also like to use the access data for your Wi-Fi for registration in My Cortado, activate the corresponding checkbox. Please note that the Wi-Fi password is stored legibly in the enrollment QR code. So only use this option if the users know the Wi-Fi password anyway.

Device integrity policy
Learn how to configure the device integrity policy settings for Google here.

NEW ADMINISTRATION PORTAL: Configure Android Enterprise
The new administration portal is currently in the beta phase. You are welcome to send us your feedback on the new portal using the corresponding button (at the bottom left of the new administration portal).
Note! We show you how to initially configure Android Enterprise in our help article Create Managed Google Play accounts for Android Enterprise. Unfortunately, this feature is not yet available in the new administration portal. However, you can already configure Android Enterprise in the new portal. You can find out how to do this in this article.
You can configure a variety of settings in the Android Enterprise tab:
- Manage Android Enterprise
- Unregister from Android Enterprise
- Manage Android Enterprise account
- Set up Enrollment Wi-Fi
- Device synchronization (push/synchronization)
- Device integrity policy
Manage Android Enterprise
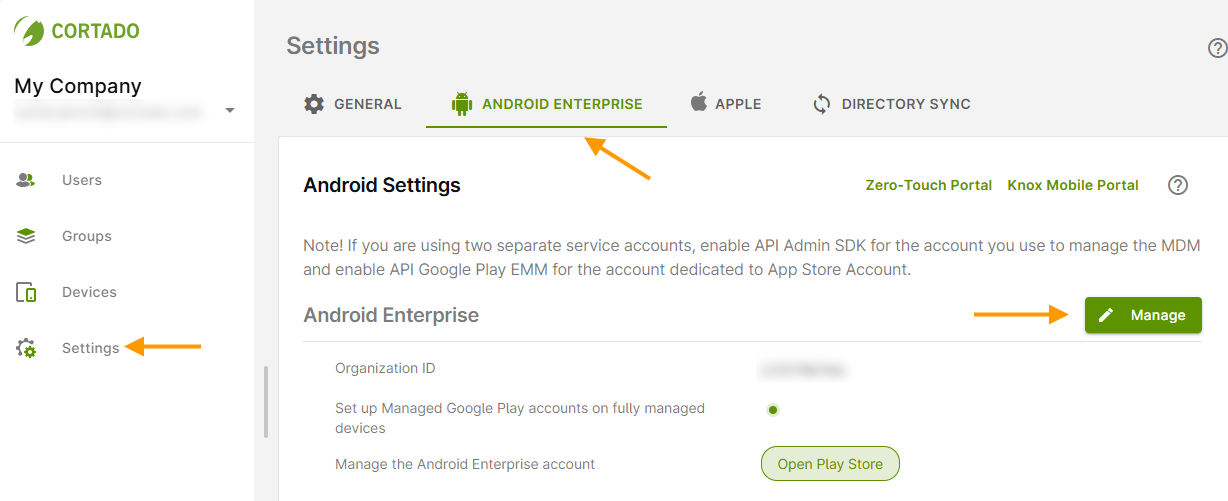
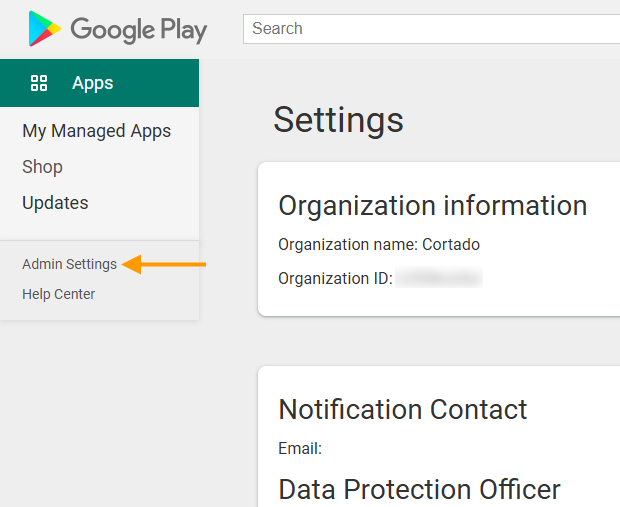
Open the Settings (left arrow in illus.) and select the Android Enterprise tab (middle arrow in illus.).
Under Android Enterprise, click Manage (right arrow in illus.).
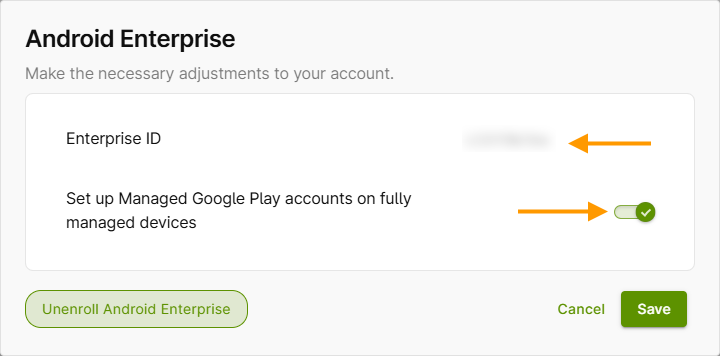
Here you will find your Enterprise ID (upper arrow in illus.).
You will also find the checkbox Set up Managed Google Play accounts on fully managed devices (lower arrow in illus.). This is enabled by default. If you want users of fully managed devices (COBO) to manage their own apps, uncheck the box. For more information, see our help article: How to let users of fully-managed Android devices use their own Google accounts.
Note! The check mark must also be removed to configure a Murena Fairphone. For more information, see our help article: How to manage a Murena Fairphone with Cortado MDM.
Unregister from Android Enterprise
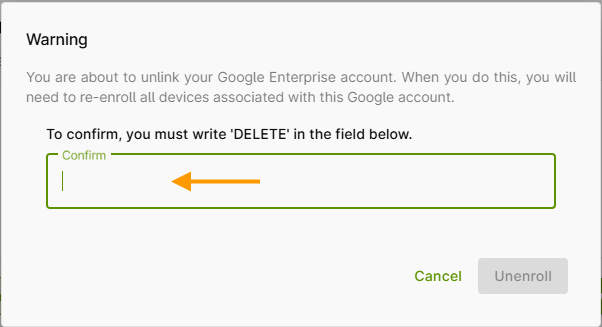
You can also unregister your company from Google for Android Enterprise if you no longer wish to use it.
- To do so, click on the Unregister Android Enterprise button (see illus. above) and then enter the word DELETE in the field provided (arrow in illus.) to confirm.
Manage Android Enterprise account
You can also change the settings for your Android Enterprise account here.
- To do this, click on Open Play Store (arrow in illus.).
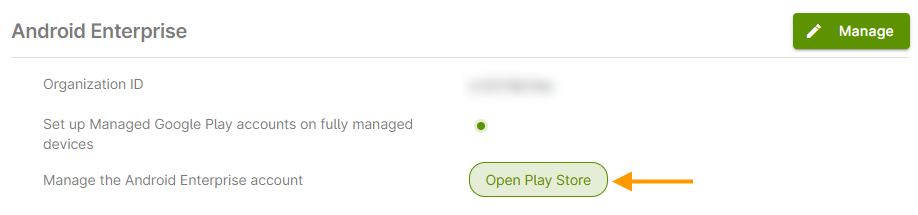
- Sign in with the Google account you used to set up Android Enterprise.
- Now you can edit all settings for your Android Enterprise account under Admin settings.
Set up Enrollment Wi-Fi
- Open the Settings in the administration portal and then switch to the Android Enterprise tab.
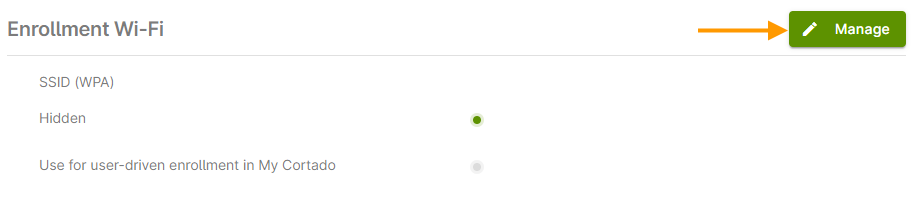
- Under Enrollment Wi-Fi, click Manage (arrow in illus.).
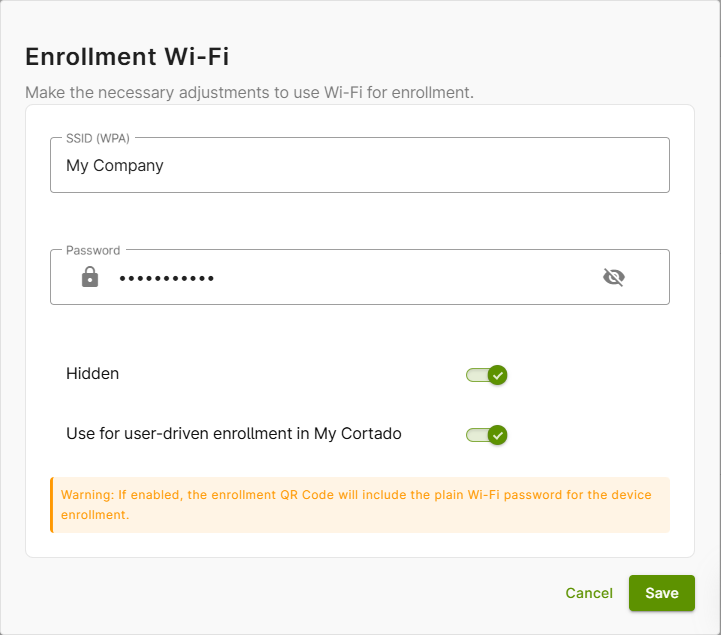
Here you can store the access data for the Wi-Fi network in which the devices are to be registered for fully managed devices (COBO) and company-owned devices that are used for both business and private purposes (COPE). This means that users no longer have to enter this access data during registration on the Android device. This simplifies the registration process.
Note! If the device is not connected to the Wi-Fi network stored here during registration, the registration will fail. It is not possible to enter the access data manually. Therefore, only store access data if you are sure that the device registration will be carried out in the Wi-Fi network stored here.
If you would like to use the access data for your Wi-Fi network for registration in My Cortado, activate the corresponding checkbox. Please note that the Wi-Fi password is stored in a readable form in the registration QR code. Therefore, only use this option if the users already know the Wi-Fi password.
Device synchronization (push/synchronization)
- Open the Settings in the administration portal and then switch to the Android Enterprise tab.
- Under Push/Synchronization, click Manage (arrow in illus.).

We recommend using immediate push notifications based on Google Firebase Cloud Messaging. This setting is enabled by default. This ensures that all assignments (apps, profiles, policies, etc.) to users' devices are executed immediately.
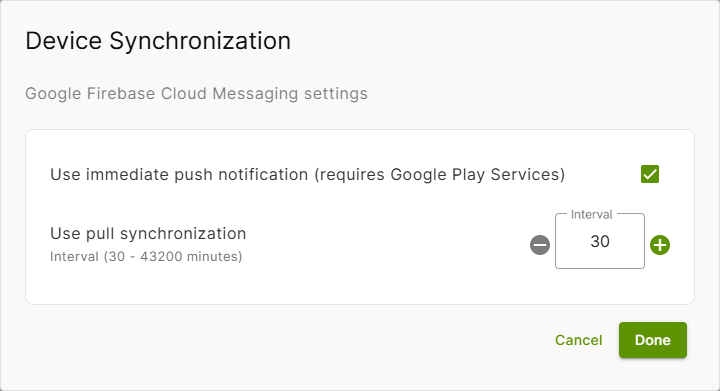
Note! Please note that Google Play Services must be enabled in the Google Workspace Admin portal (arrow in illus.).

Otherwise, pull synchronization will be used automatically. Here you can set an interval between 30 and 43.200 minutes during which users' devices will be synchronized regularly. Apps, policies, profiles, etc. will then be pushed to the devices at the specified interval.
Device integrity policy
- Open the Settings in the administration portal and then switch to the Android Enterprise tab.
- Under Device Integrity Policy, click Manage (arrow in illus.).

Here you can set a minimum integrity level for device security. There are three levels (low, medium, and high).
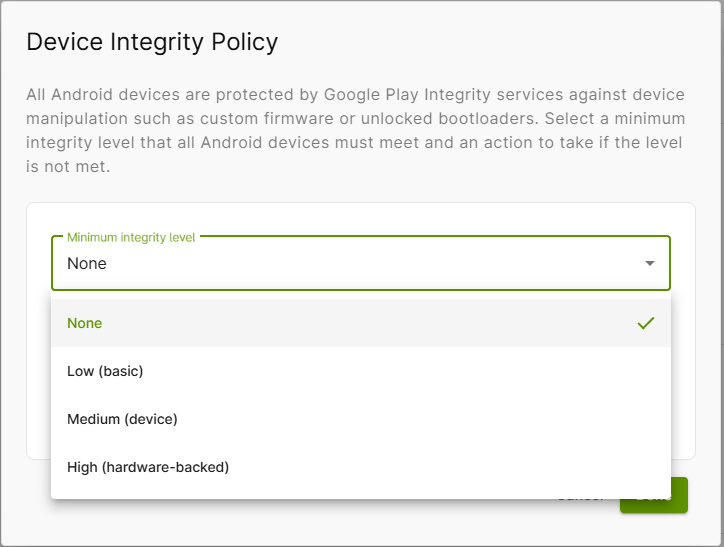
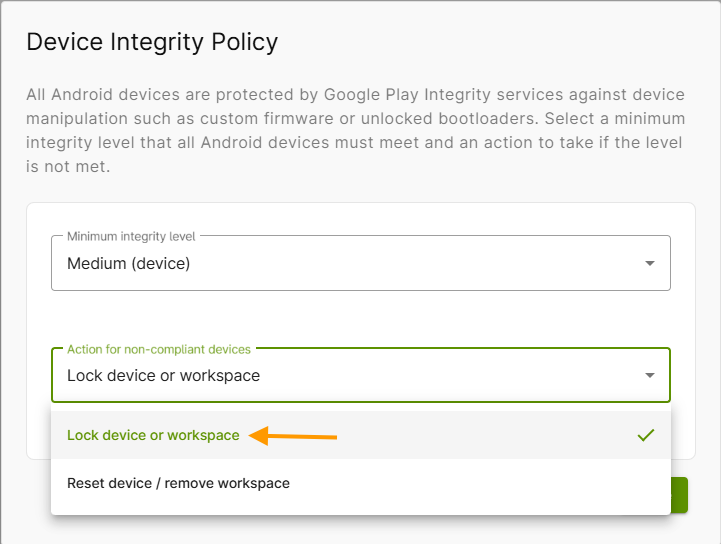
For each of the three levels, you can also specify which actions should be performed for non-compliant devices. For example, a device (or workspace) that does not meet the criteria can be locked or reset.
We recommend using the Lock device or workspace option, as experience has shown that it can quickly happen that a device no longer runs compliant, especially at a high integrity level.
For more information on this topic, see our help article How to set a minimum integrity level for Android devices.