This feature is already available in our new administration portal. The new portal is currently in beta. Instructions for using the new portal can be found at the end of this article.
In this article you will learn how to manage your local groups. On the other hand, to learn what to consider when managing groups imported from Microsoft Entra ID, see our help article Managing Microsoft Entra Groups.
Assign settings to a local group
Overview
If you select at least one group in the Administration Portal, under Administration→ Groups the following options are available:

| Assign/Unassign | You can assign and remove groups here. |
| Delete | Here you can delete selected groups from Cortado Administration Portal. |
| Transfer Settings | With this action you can assign settings from one user to another (Settings, Policies, Profiles, Apps). |
| Edit | You can add a comment to the group here. |
| Enroll Device | With this action you can configure the users’ devices yourself or together with the user (see Embedding mobile devices). |
| Remove Settings | Here you can delete configuration settings for selected groups. You can select which settings you want to delete. Select the relevant settings (Policies, Profiles, Apps) and delete them with Remove. |
Assign local groups to users or devices retrospectively
When adding single users (Enter single user) and for Import users from .csv file you can select or specify the group directly during import. If you want to add users or devices to a group at a later date, proceed as follows:
- Under Administration→ Groups select a group (left arrow in illus.) and then click on Assign (right arrow in illus.).
- Then click on Assign users or Assign devices.

- Select the users (left-hand image) or devices (right-hand image) that you would like to add to the group and confirm with OK.
Note! We recommend that you do not mix users and devices within a group, i.e. always create user-only and device-only groups.

Note! Alternatively, you can specify one (or more) group(s) to which the users will be automatically added during the import.
Note! As soon as a user is subsequently added to a group, all properties of the group are automatically rolled out for him/her. Manual rollout is no longer necessary.
Change local group
- Select a group (left arrow in illus.).
- You can now use Assign or Unassign to switch the group membership of the users.

Assign settings to a local group
You can assign settings (Policies, Profiles, Apps, Managed Configurations(for iOS or Android) or eBooks (Apple)) to a group. To do this, go to Administration→ Policies, Administration→ Profiles, or Administration→ Apps, select the appropriate setting, and assign the desired group (example in illus.).

Or, under Administration→ Groups, select a group and then (depending on what you want to assign) open the Policies, Profiles, or Apps tab.

After that, select Assign to assign either policies, profiles, apps, managed configurations, or an eBooks (Apple) to the group. For more information about this, see our help article Assign settings in user and group management.

Note! Manual rollout of the newly assigned setting is not necessary.
NEW ADMINISTRATION PORTAL: Manage local groups
The new administration portal is currently in the beta phase. You are welcome to send us your feedback on the new portal using the corresponding button (at the bottom left of the new administration portal).
In this article, we explain what you need to know about editing, enabling/disabling and deleting your local groups and Entra groups.
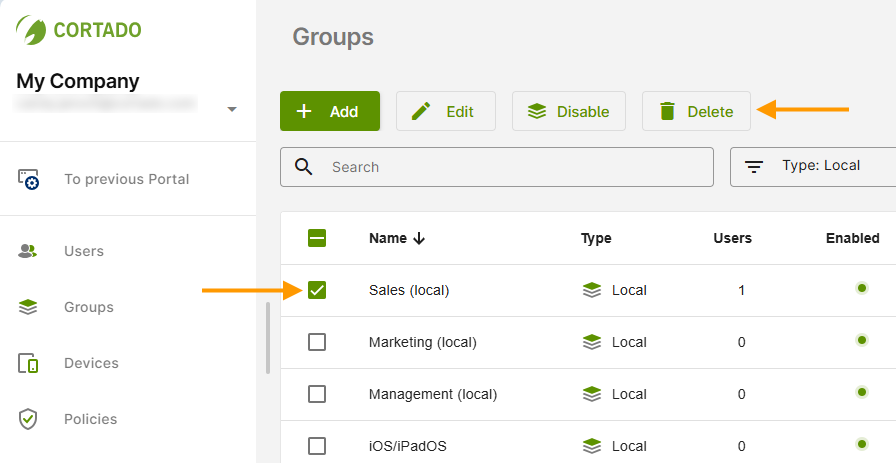
- Open the group management by clicking on Groups (left column in the image).
- Select a local group (left arrow in the image).
Note: Here we show you how to search for, filter, and export users, groups, and devices in the new administration portal and how to configure the columns in the overview.
The following options are now available (right arrow in the image):
Note! We show you how to add new local groups in the administration portal in our help article Creating local groups.
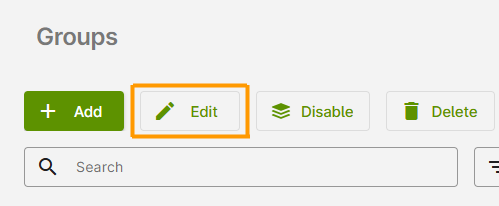
Edit
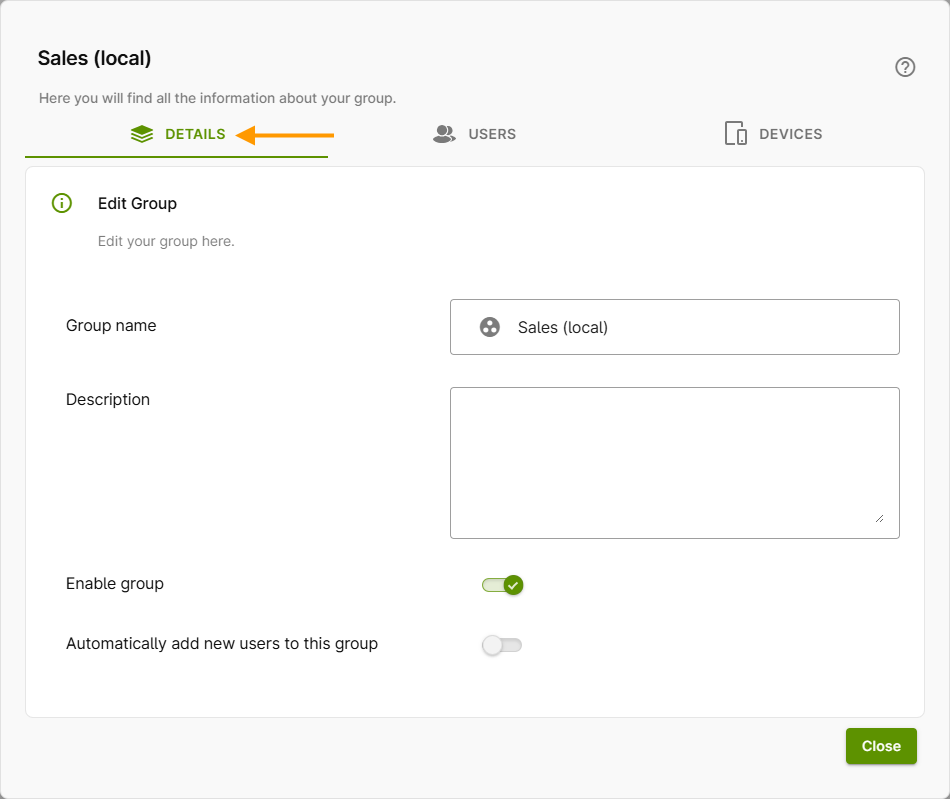
- In the Details tab (arrow in the image), you can now change all previously defined properties (group name, description, etc.).
- Enable group: Here you can activate/deactivate your group. A deactivated group is treated as non-existent, i.e., all policies, profiles, apps, settings, etc. are no longer enforced for users or devices. However, the users or devices themselves are not deactivated. You can also activate and deactivate groups using the corresponding button in the group overview (see image above).
- Automatically add new users to this group: Activate the checkbox if you want all new users to be automatically added to this group after importing them into the administration portal.
- In the Users tab, you can see which users are members of the selected group. You can also add additional users here. We show you how to do this in our help article Adding users to groups.
- In the Devices tab, you can see which devices belong to the selected group. You can also add additional devices here. We show you how to do this in our help article How do I retroactively assign devices to a local group?
Enable/Disable
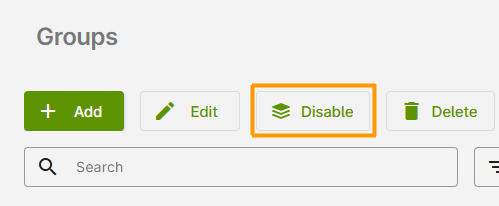
Here you can deactivate an activated group (and vice versa). A deactivated group is treated as non-existent, i.e., all policies, profiles, apps, settings, etc. are no longer enforced for users or devices. However, users who are members of this group are not deactivated.
Delete
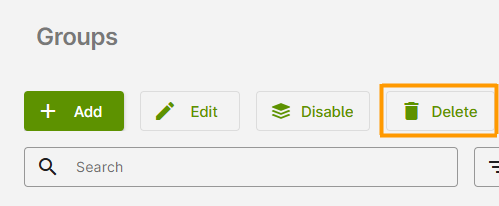
Here you can delete the selected local groups. However, the users who are members of these groups will not be deleted. Please refer to our help article Managing local users for more information.