This feature is already available in our new administration portal. The new portal is currently in beta. Instructions for using the new portal can be found at the end of this article.
Request and install certificate
Overview
Caution! If you want to renew your Apple Push certificate, please follow the procedure described in our article How to renew your Apple Push Certificate.
An Apple Push Certificate is required for establishing a secure connection between the Cortado Administration Portal and iOS/iPadOS/macOS devices. Cortado sends the corresponding notification to the device via the Apple Push Notification service (APNs), requesting that it log in to Cortado. So no information is transmitted. The Apple Push Notification Service only wakes the device from hibernation, so that it can be logged on to Cortado. All configuration information, settings and requests go via an (encrypted) SSL connection directly from the administration portal to the iOS/iPadOS/macOs devices.
Request and install certificate
Before you can request a certificate from Apple, you first have to run a Certificate Signing Request (CSR).
- For CSR, select in the Administration Portal: Administration→ Settings.

- Under Apple Push Certificate click on Generate Certificate Request (arrow in illus.).

- Fill out the form and confirm with OK.

- Click on Submit to open a new website.

- By clicking Submit (see above), the Certificate Signing Request was automatically uploaded to the new website and signed by Cortado.

- In step 2 you can download the signed certificate request (CSR).

The signed CSR file is then saved.

- Then go to the Apple website (Apple Push Certificates Portal) and log in using your Apple ID.

- Click on Create a Certificate (arrow in illus.).

- Select your signed certificate request, and upload it.

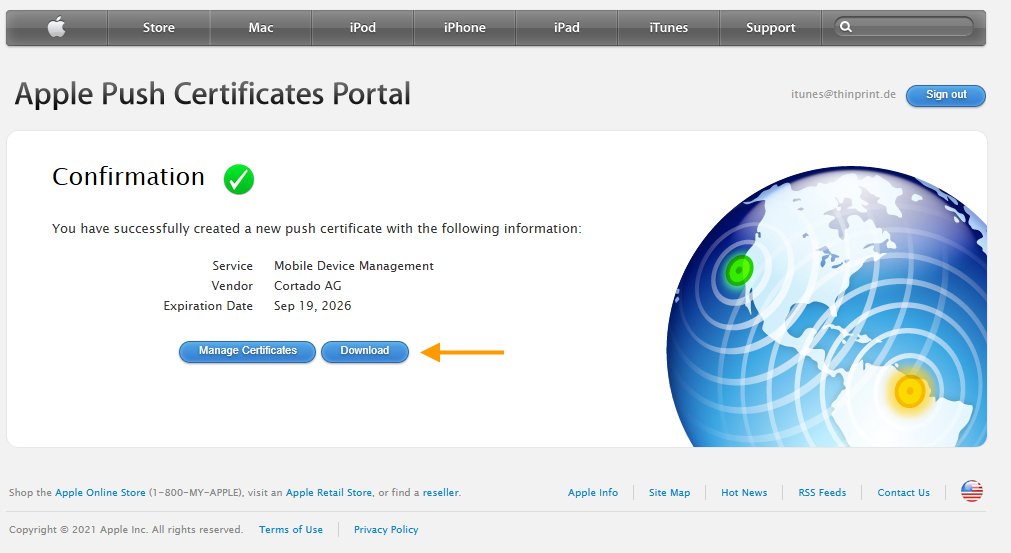
- Shortly after, you can download your certificate in .pem format (arrow in illus.).

The downloaded Apple Push Certificate is saved.

- Upload the .pem file by clicking Choose Certificate in the Administration Portal.

The successfully uploaded Apple Push certificate is now displayed in the Administration Portal:

Export and import certificate
- Save a backup of the certificate in .pfx format with Export Apple Push Certificate.
- With this version of the certificate, you can avoid future need for the procedure described above.

- Enter a password for your certificate.

- Using Import Apple Push Certificate you can install it again anytime.
- To do so select the certificate with Choose Certificate and enter your password.

Caution! If you want to renew your Apple Push certificate, please follow the procedure described in our article How to renew your Apple Push Certificate.
NEW ADMINISTRATION PORTAL: Set up Apple Push Certificate
The new administration portal is currently in the beta phase. You are welcome to send us your feedback on the new portal using the corresponding button (at the bottom left of the new administration portal).
Overview
Caution! If you want to renew your Apple Push certificate, please follow the procedure described here.
An Apple Push Certificate is required for establishing a secure connection between the Cortado Administration Portal and iOS/iPadOS devices. Cortado sends the corresponding notification to the device via the Apple Push Notification service (APNs), requesting that it log in to Cortado. So no information is transmitted. The Apple Push Notification Service only wakes the device from hibernation, so that it can be logged on to Cortado. All configuration information, settings and requests go via a secure connection directly from the administration portal to the iOS/iPadOS devices.
Request and install certificate
To request such a certificate from Apple, you must first execute a Certificate Signing Request (CSR) (see below).
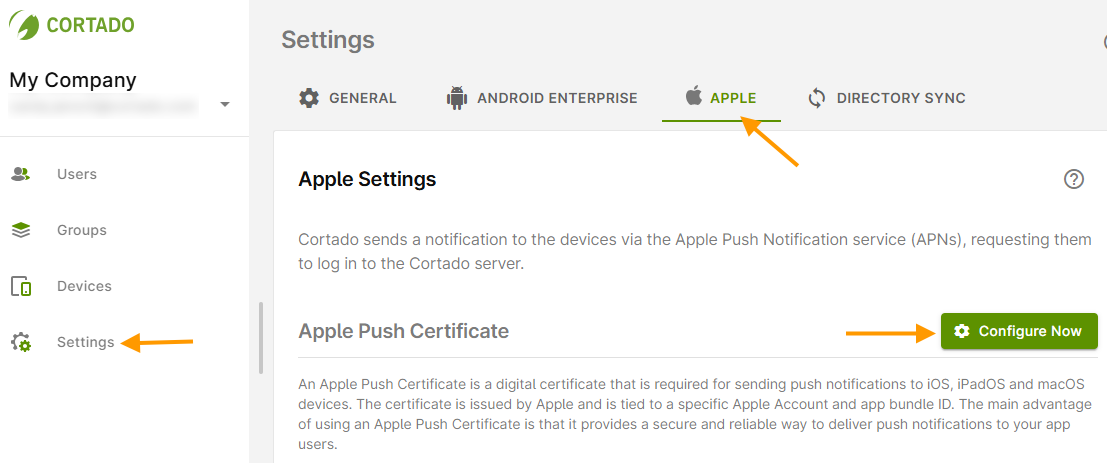
- To do this, open the Settings (left arrow in illus.) and switch to the Apple tab (middle arrow in illus.).
- Then click on Configure Now under Apple Push Certificate (right arrow in illus.).
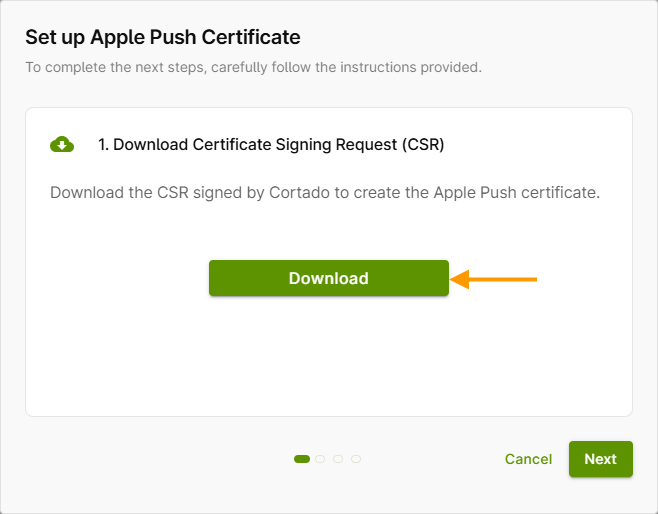
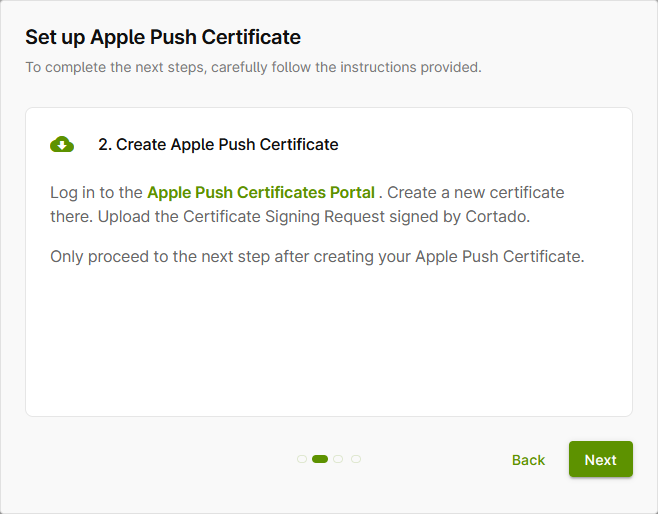
- Now download the certificate signing request (CSR) signed by Cortado by clicking on Download (arrow in illus.).
- Then click on Next.
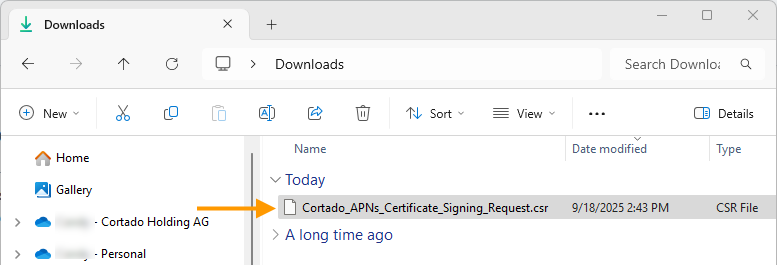
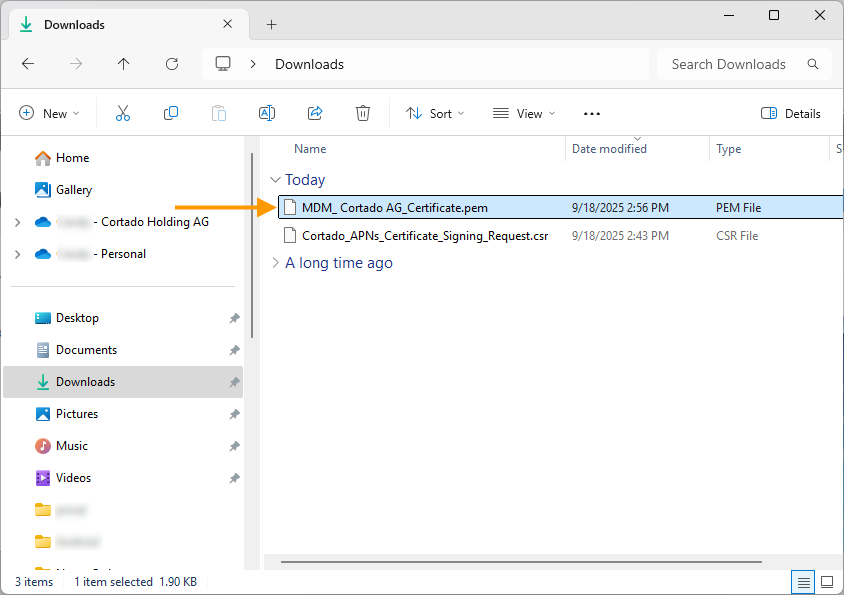
The downloaded, signed CSR file will be saved in your downloads folder (arrow in illus.).
- Then go to the Apple website (Apple Push Certificates Portal) and log in using your Apple ID.
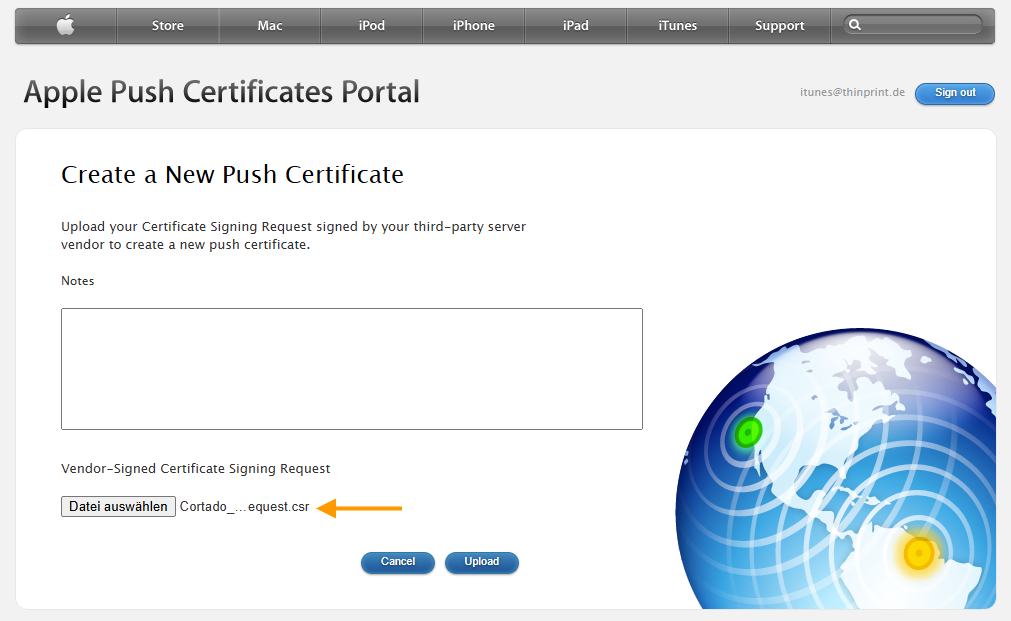
- Click on Create a Certificate (arrow in illus.).
- Select your signed certificate request, and upload it.
- Shortly after, you can download your certificate in .pem format (arrow in illus.).
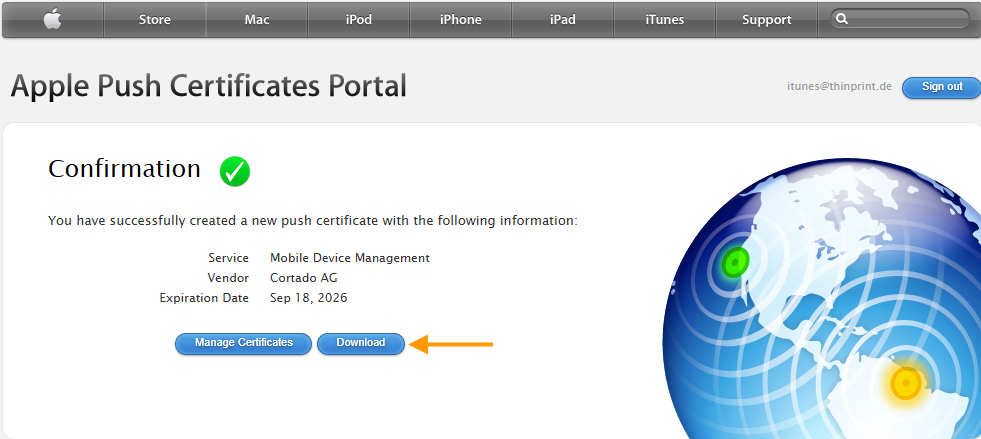
The downloaded Apple Push Certificate is saved.
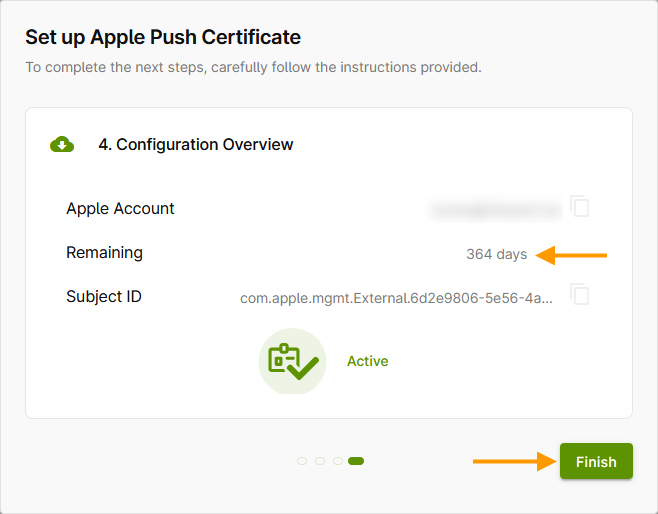
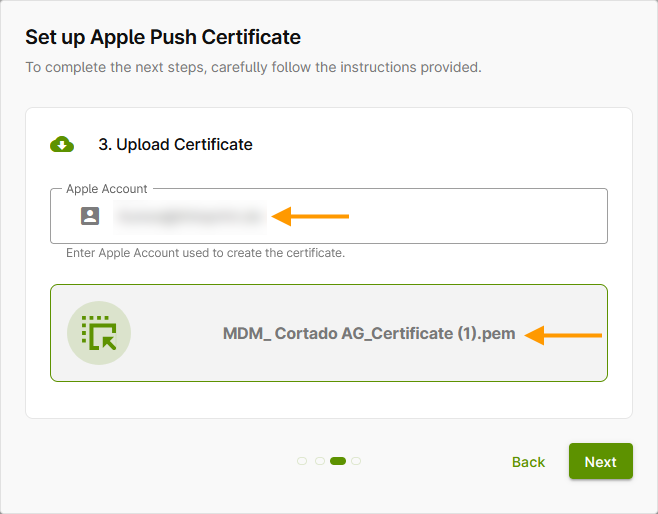
- In the next window, enter the Apple account used to create the certificate (upper arrow in illus.).
- Upload the .pem file (lower arrow in illus.).
Note! The Apple Push certificate must be renewed annually, which requires the Apple account used to create this certificate each time.

The successfully uploaded Apple Push certificate is now displayed in the administration portal:
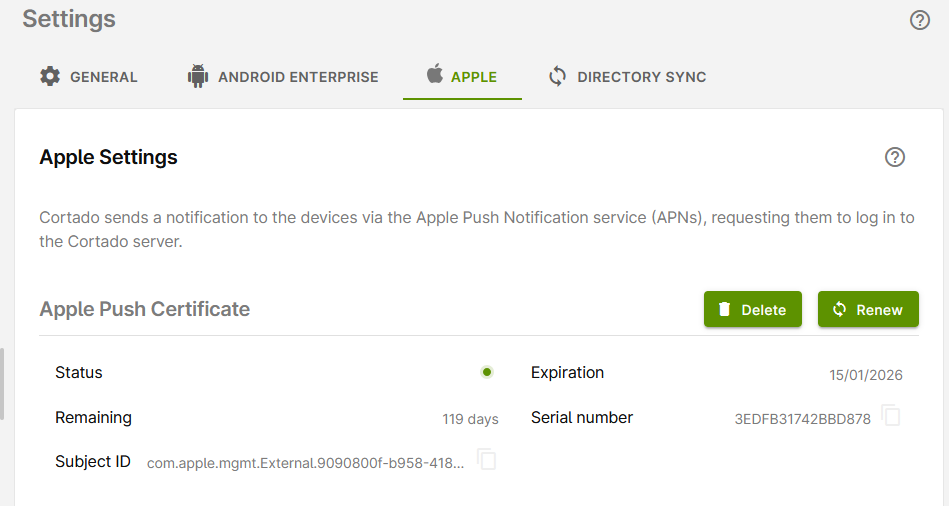
Renew certificate
Your Apple Push Certificate is issued by Apple for one year at a time. It must therefore be renewed regularly in the Apple Push Certificates Portal. Thirty days before the certificate expires, you will receive a warning message in the administration portal. Renew your certificate in good time before it expires. Otherwise, your devices will lose their connection to the server.
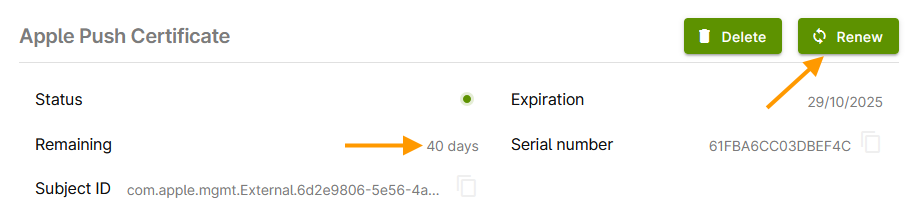
In the administration portal under Settings→ Apple→ Apple Push Certificate, you can see how long your certificate is still valid (left arrow in illus.).
- Click on Renew to start the process (right arrow in illus.).
Note! Only use the Renew button if you want to extend the existing certificate. If you want to set up a completely new certificate, first delete the existing certificate and then start the reconfiguration.
- Now download the certificate signing request (CSR) signed by Cortado by clicking on Download (arrow in illus.).
- Then click on Next.
The downloaded, signed CSR file will be saved in your downloads folder (arrow in illus.).
- Then log in to the Apple Push Certificates Portal with your Apple account. You must use the same Apple account that was originally used to create the expired certificate.
- Check in the Apple Push Certificate Portal, using the serial number of the certificate, whether it is the certificate to be renewed. You can find the serial number (upper arrow in illus.) by clicking on the Info button (lower arrow in illus.).
- If the certificate is correct, click on the Renew button.
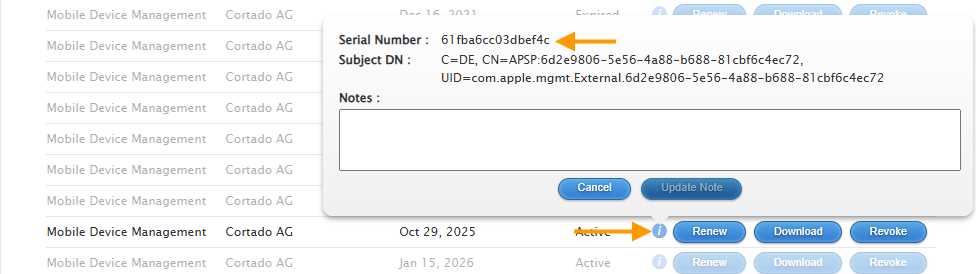
- Compare the serial number with the number in the Cortado administration portal.

- If the serial numbers match, click Renew (see illus.).
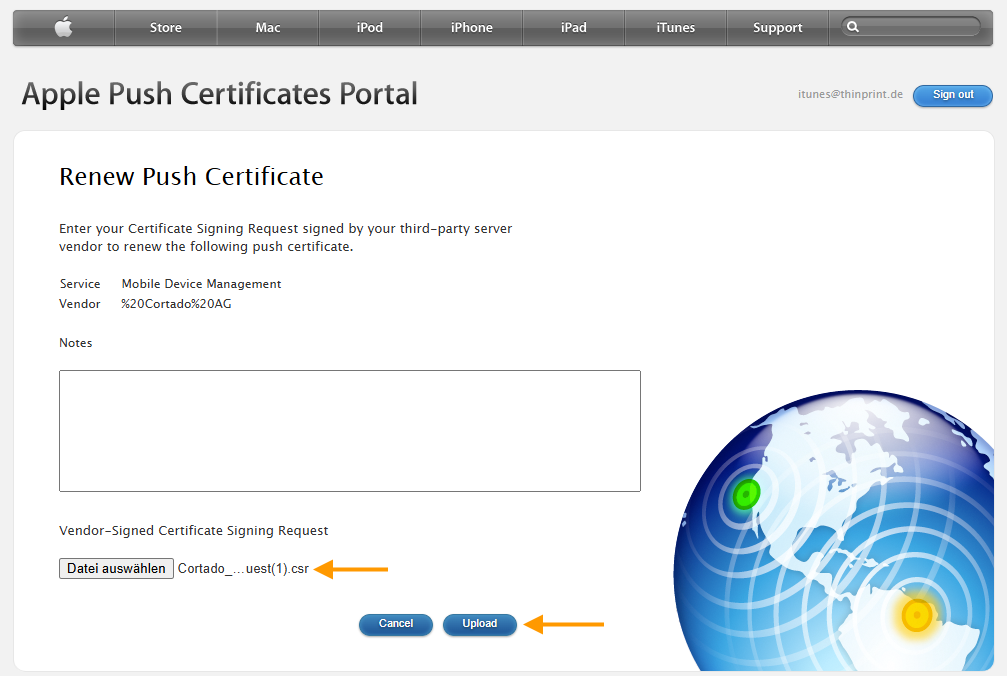
Attention! To renew the certificate, do not use the Create a certificate button, but rather the Renew button. Otherwise, you will generate a new certificate and all users will have to re-register their devices.

- Select your signed certificate request and upload it.
- Shortly afterwards, you can download your certificate in .pem format (arrow in illus.).
- The downloaded Apple Push Certificate will be saved in your Downloads folder.
- In the next window, enter the Apple account used to create the certificate (upper arrow in illus.).
- Upload the .pem file (lower arrow in illus.).
Note! The Apple Push Certificate must be renewed annually, which requires the Apple account used to create this certificate each time.
The successfully uploaded Apple Push certificate will then be displayed in the administration portal: